ParaView:Build And Install: Difference between revisions
mNo edit summary |
|||
| Line 168: | Line 168: | ||
====On Windows==== | ====On Windows==== | ||
We recommend [http:// | We recommend [http://msysgit.github.io/ msysgit]. msysgit provides an msys shell that has the appropriate environment set up for using git and it's tools. | ||
</div> | </div> | ||
|} | |} | ||
Revision as of 16:42, 19 December 2014
Introduction
This page is applicable for ParaView 3.98 and above. For ParaView 3.14.1 and earlier versions, refer to the past version of this document.
This page describes how to build and install ParaView. It covers both the released and the development versions, both Unix-type systems (Linux, HP-UX, Solaris, Mac), as well as Windows.
ParaView depends on several open source tools and libraries such as Python, Qt, CGNS, HDF5, etc. Some of these are included in the ParaView source itself (e.g. HDF5), while others are expected to be present on the machine on which ParaView is being built (e.g. Python, Qt, CGNS). Based on whether you want to build ParaView along with all the external tools it needs or you want to build the external tools yourself (or use versions already available on your system), there are two ways to build ParaView from source.
- To build ParaView complete with all the dependencies it needs, use the ParaView Super-Build instructions.
- To build ParaView source itself by providing existing installations/builds of the external depencies, typical for developers, use the instructions on this page.
Prerequisites
- The ParaView build process requires CMake version 2.8.8 or higher and a working compiler. On Unix-like operating systems, it also requires Make, while on Windows it requires Visual Studio (8 or later).
- Building ParaView's user interface requires Qt, version 4.7.* (4.8.* is recommended). To compile ParaView, either the LGPL or commercial versions of Qt may be used.
- In order to use scripting, Python is required [3].
Download And Install CMake
CMake is a tool that makes cross-platform building simple. On several systems it will probably be already installed. If it is not, please use the following instructions to install it. If CMake does not exist on the system, and there are no pre-compiled binaries, use the instructions below on how to build it. Use the most recent source or binary version of CMake from the CMake web site.
Using Binaries
There are several precompiled binaries available at the CMake download page.
On Unix-like operating systemsLet's say on Linux, download the appropriate version and follow these instructions: cd $HOME wget http://www.cmake.org/files/v2.8/cmake-2.8.8-Linux-i386.tar.gz mkdir software cd software tar xvfz ../cmake-2.8.8-Linux-i386.tar.gz
|
On Windows
On Windows, if you are not administrator
|
Build Your Own CMake
On Unix-like operating systemsDownload the source code: http://www.cmake.org/files/v2.8/cmake-2.8.8.tar.gz cd $HOME wget http://www.cmake.org/files/v2.8/cmake-2.8.8.tar.gz tar xvfz cmake-2.8.8.tar.gz cd cmake-2.8.8 ./configure --prefix=$HOME/software make make install
|
On WindowsTo build CMake on windows, a previous version of CMake is required. This can be downloaded from the Cmake download page: [4]. |
Download And Install Qt
ParaView uses Qt as its GUI library. Qt is required whenever the ParaView client is built.
- As stated above, the LGPL of Qt can be found at [5].
- For source code, use the latest stable version of qt-everywhere-opensource-src-VERSION.[tar.gz or zip or dmg]. If this gives you trouble, version 4.8.2 is known to work.
- For binaries, use the latest stable version of qt-PLATFORM-opensource-VERSION.[tar.gz or zip or dmg]. If this gives you trouble, version 4.8.2 is known to work. When downloading binaries, ensure that your compiler version matches the Qt compiler indicated.
Download And Install ffmpeg (.avi) movie libraries
When the ability to write .avi files is desired, and writing these files is not supported by the OS, ParaView can attach to an ffmpeg library. This is generally true for Linux. Ffmpeg library source code is found here: [6]
Download And Install MESA 3D libraries
ParaView uses the OpenGL graphics drivers and card from a user's workstation. When you want to run ParaView's servers on a platform that does not include hardware OpenGL support, you must use MESA to emulate this hardware in software. Mesa is open source, and it can be downloaded from here: [7].
There is a known problem with MESA version 7.8.2 and ParaView. This has been reported to the MESA team. Version 7.7.1 has been tested and seems to work correctly as well as 7.9.
Build as follows:
- make realclean
- make TARGET (for instance, make linux-x86-64)
Note - some platforms will complain during ParaView compiles about needing fPIC. In the configs directory, copy your platform file to another custom file, edit it, and add -fPIC to the compile lines. For instance, cp linux-x86-64 linux-x86-64-fPIC.
For more elaborate discussion on building with Mesa/OSMesa support, refer to ParaView And Mesa_3D.
Download ParaView Source Code
If you are trying to build a ParaView release, download it from the release page. For the development version, please follow the instructions below for checking it out from git.
Download The Release
Don't forget that you can always just download the binaries from the ParaView download page. This page contains binaries for several platforms and the source code for the releases.
Note: debian build
List of packages to build ParaView on Debian:
libphonon-dev libphonon4 qt4-dev-tools libqt4-core libqt4-gui qt4-qmake libxt-dev g++ gcc cmake-curses-gui libqt4-opengl-dev mesa-common-dev
With MPI (using openmpi, you can use any other flavour):
openmpi-common openmpi-bin libopenmpi-dev
With Python:
python-dev
Checkout Development Version from git
Note that you may need to download and install a git client, here: [8]
On Unix-like operating systemsPrepare directory for download # mkdir $HOME/projects # cd $HOME/projects To download the source code # git clone git://paraview.org/ParaView.git ParaView # cd ParaView # git checkout -b trunk origin/master # git submodule init # git submodule update To update the code # git fetch origin # git rebase origin/master #git submodule update |
On WindowsWe recommend msysgit. msysgit provides an msys shell that has the appropriate environment set up for using git and it's tools. |
Configure ParaView With CMake
- Always use a separate build directory. Do not build in the source directory.
On Unix-like systems
mkdir $HOME/projects/ParaView-bin
cd $HOME/projects/ParaView-bin

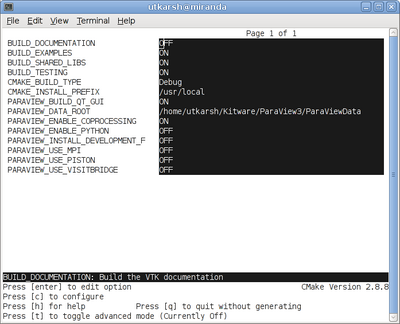
ccmake $HOME/projects/ParaView3
About CCMake (Curses CMake GUI)
|
On Windows
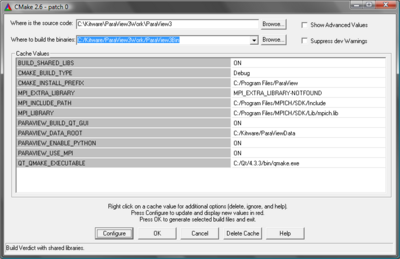
About CMakeSetup (Windows CMake GUI)
|
ParaView Settings
| Variable | Description |
| BUILD_SHARED_LIBS | If ON, use shared libraries. This way executables are smaller, but you have to make sure the shared libraries are on every system on the cluster. This option should be set to ON if you plan on using plugins for ParaView (there ways to use plugins in static builds of ParaView for advanced users). |
| PARAVIEW_USE_MPI | Turn this to ON to enable MPI. Other MPI options will not be available until you turn this on. |
| MPI_C_LIBRARIES | Paths to the MPI libraries (such as /usr/lib/libmpi.so). Should be found by default, but you may have to set it. Certain mpi implementations need more than one library. All the libraries can be specified by separating them with a ';'. (see the note below) |
| MPI_C_INCLUDE_PATH | Path to MPI includes (such as /usr/include/mpi). Again, this should be found by default. |
| PARAVIEW_ENABLE_PYTHON | Makes Python client scripting and the Python programmable filter available. |
| PARAVIEW_BUILD_QT_GUI | Flag to enable/disable the building of the ParaView Qt-based client. This option is useful when building ParaView on server nodes or when we are only interested in the Python client, as it avoids building of the Qt client thus does not require Qt. ON by default. |
| QT_QMAKE_EXECUTABLE | Path to Qt's qmake executable (such as /usr/local/bin/qmake). CMake uses this to locate the rest of the required Qt executables, headers and libraries. |
| PARAVIEW_ENABLE_FFMPEG | Enable FFMPEG support (UNIX only) |
| PARAVIEW_USE_VISITBRIDGE | Enable VisItBridge that adds support for additional file formats (requires Boost) |
Note for MPI settings: If your MPI variables aren't set automatically (usually the case if the compiler wrapper [mpicxx] is not in the path or in some standard directory), toggle advanced options and set MPI_COMPILER variable to the full path of your mpi compiler (usually mpicxx), and configure. This should set all the required MPI variables. If not, then you might need to enter them manually.
If you get an error such as "mpi.h: no such file or directory" then set the CMAKE_C_FLAGS= -lmpi and the CMAKE_CXX_FLAGS= -lmpi++ . This is in addition to the MPI variables.
Finish Configuring ParaView
Using CCMake
|
Using CMakeSetup
|
Build ParaView
You can now build ParaView using the appropriate build system.
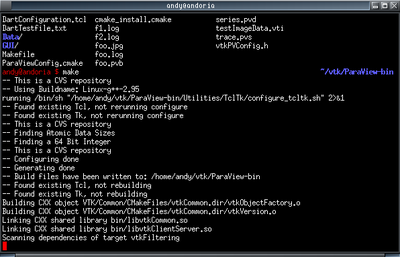
Using MakeCMake will now generate Make files. These make files have all dependencies and all rules to build ParaView on this system. You should not however try to move the build directory to another location on this system or to another system. Once you have makefiles you should be able to just type: make
make -j 4 |
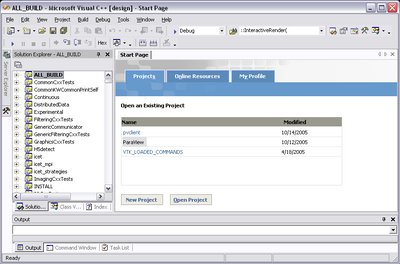
Using Visual StudioCMake will now create Visual Studio project files. Before you open Visual Studio, be sure that the Qt .dlls are in your path. You should now be able to open the ParaView project (or workspace) file. Make sure to select the appropriate build type (Debug, Release, ...). To build ParaView, simply build the ALL_BUILD target. |
Install ParaView
ParaView can be run directly from the build directory. That said, for production environments, it should be installed in some system location.
For that purpose simply follow these instructions to install to an appropriate location. (these need to be updated for Windows). Note that ParaView is designed to install what it builds. Thus only the libraries and executables that ParaView builds are installed. For example, these instructions will not install Qt or ffmpeg libraries to the specified location. If you are interested in creating a binary package that is complete and can be distributed to other users/systems, you may want to refer to ParaView Super-Build.
CMake Variables
Some of the CMake variables that affect installation rules are:
| Variable | Value | Description |
| CMAKE_INSTALL_PREFIX | <path> | Set this to the root of the location where you want ParaView to be installed. For unix based systems, ParaView will be installed under bin/ lib/ directories under this install prefix. This option is not available on Mac OSX. |
| CMAKE_BUILD_TYPE | Release | Unless you want to end up with debug install, set this to Release. |
| PARAVIEW_INSTALL_DEVELOPMENT_FILES | OFF/ON | To install development files, including headers, so that developers can build plugins/custom-applications using the installed version of ParaView, set this to ON. Currently, this option is not available on Mac OSX or Windows. |
| MACOSX_APP_INSTALL_PREFIX | <path> | Set this to the location where you want ParaView to install the app bundle on "make install". This option is only available on Mac OSX |
Installing
Following the configuration, simply run 'make' to compile and build.
On Unix-like operating systems:make install This will install all the relevant files in directories under the CMAKE_INSTALL_PREFIX. The executables are installed in ${CMAKE_INSTALL_PREFIX}/bin and the libraries are installed in ${CMAKE_INSTALL_PREFIX}/lib/paraview-${major}.${minor}. |
On Windows:<to be decided> |
On Mac:make install This will create an app bundle in the directory specified by MACOSX_APP_INSTALL_PREFIX. This app bundle will have the main application executable under APP/Contents/MacOS, libraries under APP/Contents/Libraries, plugins under APP/Contents/Plugins, and additional executables such as the server executables and python executables under APP/Conents/bin. |
Notes on Mac OSX
On Mac OSX, "make install" will install an app bundle to the location specified by MACOSX_APP_INSTALL_PREFIX. This app will contain all the ParaView libraries, plugins, python scripts, etc. that were built by ParaView. You can move this app around on the same machine like a regular app and it will work without any problems. Note, however, that this is not a redistributable app bundle. You cannot ship this off to your friend and expect it to work. This app does not include any *external dependencies*, such Qt libraries, or Python libraries, and has references to the versions that you used to build ParaView. This is not unique to Mac OSX, but to all other plaforms as well. "make install" is used to install runtimes to be used on the same machine. To generate redistributable packages, refer to ParaView Super-Build instructions.
Miscellaneous Comments
- Build trees of ParaView on non-Windows systems, always have RPATH information embedded in the binaries. When a make install is performed or CPACK is used, all RPATH information is stripped from the binaries in the install tree (expect for paths to external libraries). By default ParaView builds forwarding executables (launchers) that are installed in the bin directory. These binaries properly set up the environment to launch the equivalent executable in the lib/paraview-x.y directory.
- If you are compiling a MESA version of the ParaView server, start the server with the --use-offscreen-memory flag.
Notes
Environment Variables
If you build with shared libraries, you may have to add the Qt directory to you PATH environment variables to run ParaView. With Windows, one way to do so is to open up the environment variables dialog by clicking through Start|Control Panel|System|Advanced|Environment Variables. From that dialog, add a new user variable called PATH with a value of C:\Qt\4.8.2\bin. For other operating systems, add Qt/4.8.2/lib to your LD_LIBRARY_PATH environment variable.
Frequently Asked Questions
"make install" does not install ffmpeg and other libraries as it did with 3.14.1 and earlier. Is this a bug?
This is a deliberate change. It was decided that ParaView should install only what it builds. Since ParaView doesn't build ffmpeg, it doesn't add install rules to install it. If you are interested in creating a package that includes all files ParaView depends on so that you can distribute to other, refer to ParaView Super-Build. That is supposed to do exactly that.
How do I generate a distributable ParaView package?
Refer to ParaView Super-Build. That is the process we use to generate the official binaries that are distributed on paraview.org. It streamlines the process of building all the depedencies for ParaView and then packaging them into installables or tarballs.
Do I need BUILD_SHARED_LIBS set to be ON if I want to enable Python scripting?
No. In ParaView 3.14.1 and earlier, this was indeed the case, ParaView required that BUILD_SHARED_LIBS was ON if Python support was to be enabled. That is no longer the case. BUILD_SHARED_LIBS and PARAVIEW_ENABLE_PYTHON can now be managed independently.


